The post Finish Shelf Life, and How to Extend It appeared first on Woodworking | Blog | Videos | Plans | How To.
]]>Shelf Life
Manufacturers typically suggest a shelf life of three years for most finishes, assuming they are stored correctly. That includes both aerosol and regular cans of water-based clears, paint, oil-based varnish, polyurethane, Danish oil, gel urethane, wiping varnish, lacquer and even two-part conversion varnish, provided the reactive agent is stored separately. In reality, you can often use much older material, but this is still a good “use by” guideline. It helps to write the date of purchase on cans that you buy to keep track of their age.
Shellac is different in that it depends on the cut. A five pound cut (very thick) will last three years, but what you probably use, a two pound cut or thinner, will only last about six months, even if unopened. The exception is Zinsser® SealCoat , made from a long shelf life shellac resin that will last five years.
“Pre-cat” lacquer, which is modified conversion varnish with the reactant already added, will have a much shorter shelf life, depending on the type and amount of reactant that was added. Follow the manufacturer’s suggestions, but I’ve seen “pre-cat” lacquers with shelf lives as short as six weeks and as long as a year.
There are two notable exceptions. Clear nitrocellulose lacquer will usually be fine even after a decade or two, provided the can is airtight. Ditto for clear gloss oil varnish, though not for satin or tinted varnish.
Cyanoacrylate, a moisture initiated adhesive that some folks use as a finish, sealer or pore filler, will be good for at least one year if stored unopened in the refrigerator, but don’t freeze it. Once open, store it dry and at room temperature, but don’t wipe the tip or touch the tip to the work, either of which can cause clogging. It’s usually good as long as it is still liquid.
Store for Longevity
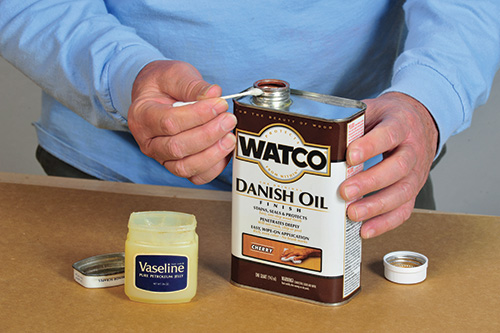
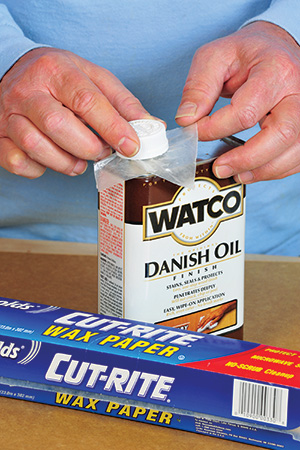
Make sure water-based paint and clear finish are well sealed in an airtight container, and store in a cool, dry place in the shop. It’s best to press can lids on with pressure around the rim. Hitting the center of a lid can warp it so it won’t seal properly. For screw-on lids, clean the lid and spout with the finish solvent, then wipe a bit of Vaseline® on the threads, or drape the spout with a sheet of waxed paper, parchment or plastic wrap so the lid doesn’t get glued on.
Oil-based finishes, like varnish, polyurethane, wiping varnish and gel urethane, will crust and even completely cure if there is air (oxygen) in the headroom, which is the area between the lid and the top of the finish. The more you use, the more headroom. Eliminate the headroom by adding marbles or stones to raise the liquid level, creating a barrier between air and finish with plastic or an isolating liquid, or replacing the oxygen with inert gas before sealing the lid.
Testing Old Finish
To test your old finish for viability, first, look at it. If it was meant to be a liquid and is now thick, crusted or separated, it’s best to discard it. Ditto for anything moldy or with a different than normal odor.
Paint, for instance, will separate into what looks like a substantial layer of clear water and a mess of pigment and resin below that looks a bit like cottage cheese. That’s a good sign it’s past its prime. Shellac deteriorates very quickly, so I’d test any shellac more than six months old. Lacquer, as usual, is an exception. Even lacquer that has gotten thicker can usually be saved by simply adding more lacquer thinner.
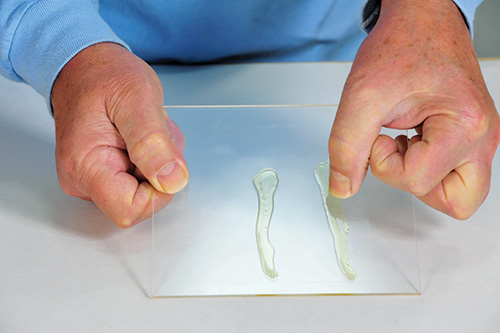
When in doubt, test it. Spread a drop or two onto a piece of glass or laminate. See if it cures solid in the time it is supposed to, and press a thumbnail into the cured finish to ensure it is solidifying sufficiently. It’s even better if you can do a comparison test: a drop of the finish in question next to a drop from a new can of the same material. If it’s viable, the old should dry as fast and as hard as the new. Finishes vary, but a good rule of thumb is that a normal coat of shellac or lacquer should dry to the touch in well under an hour, latex paint in two hours, and oil-based varnish overnight.
4 Ways to Remove the Headroom
“Headroom,” in finish storage, is the area between the lid and the top of the finish. Oxygen is the enemy here: its presence will cause a crust to form on your oil-based finishes, eventually causing all of the contents to harden. As you use more finish from the container, you get more headroom where oxygen could do its dirty work. What’s a woodworker to do? Here are a few solutions.
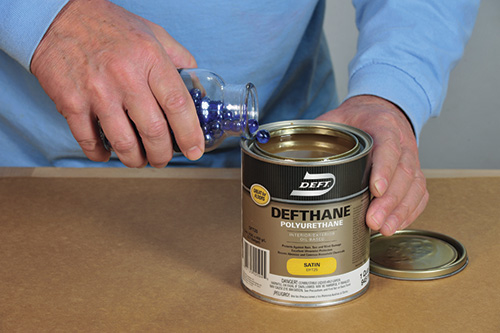
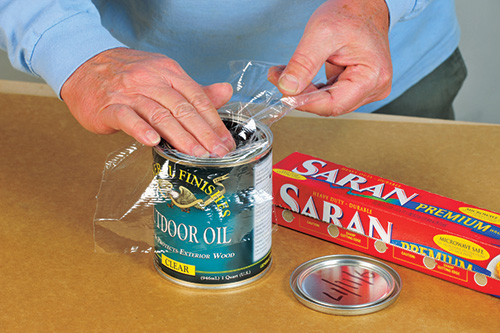
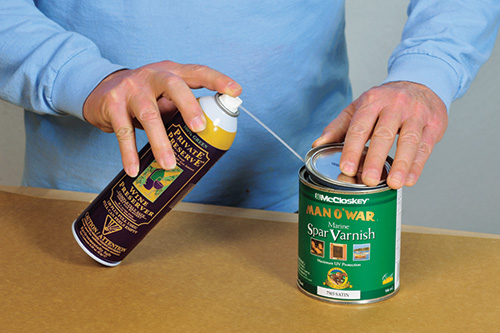
 ) under the lid.
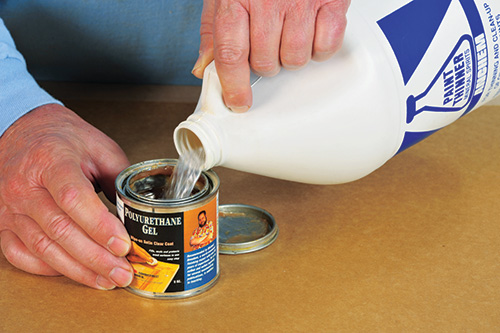
Throw it Out
Throwing away finish is not as easy as tossing out wood scraps. Liquid finish is not safe for landfills, as the solvents in it can leach into the soil and contaminate the water table. In most cases, it’s also bad news for sewer systems.
That leaves two options. If the finish will still cure (is viable, but no longer needed) you can brush it ALL out onto cardboard or scrap wood. Once it is cured, it is inert and therefore landfill safe. Viable water-based paint can also be reused/recycled at places like Habitat for Humanity and some local recycling facilities. Check in your area to see if that’s an option.
The other option, and the only one for finish that will not cure, is to find a place locally that accepts old finish. Because the rules vary so much from area to area, you’re not likely to find reliable information on a national scale. My local transfer station (the former landfill), for instance, accepts both water- and oil-based paints. Bear in mind that, unlike latex paint, oil-based and solvent-based coatings are considered hazardous waste.
Check with the folks who collect your trash — they’ll often know how to legally dispose of coatings — or do a search online for “hazardous waste disposal” in your city or area. A search for my town brought up the county recycling center contact information as well as several companies who collect hazardous waste for a fee.
The post Finish Shelf Life, and How to Extend It appeared first on Woodworking | Blog | Videos | Plans | How To.
]]>The post How to Deal with Pitchy Pine appeared first on Woodworking | Blog | Videos | Plans | How To.
]]>– Granville Jones
Trying to seal liquid sap is an exercise in futility. Spar urethane (a misnomer, by the way) is probably exterior urethane, and while it would undoubtedly cure over the sap pockets, do you really want active, oozing sap under your cured finish? That can’t end well.
The traditional material for sealing sappy knots is called “knotting” and is made of thick shellac. It works moderately well for a little while but ultimately fails. I’ve seen sap make its way through just about every clear wood finish, thick paint and even through vinyl “contact paper” drawer liner material. There is a way to “set” the sap by heating the wood past the point where sap crystallizes, but it’s probably not practical on your thick pine slab. Personally, I would consider using something else for a coffee tabletop. After all, even the best finish has its limitations.
The post How to Deal with Pitchy Pine appeared first on Woodworking | Blog | Videos | Plans | How To.
]]>The post How to Repair Scuffed Lacquer appeared first on Woodworking | Blog | Videos | Plans | How To.
]]>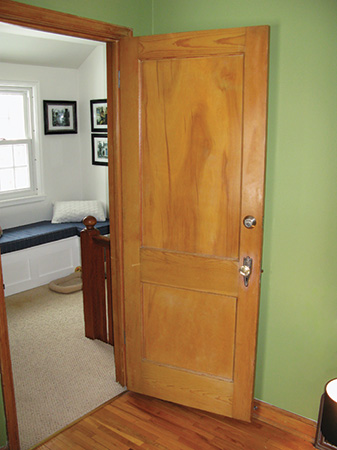
There is a product called “amalgamator” meant to do just that: melt lacquer back to smoothness. The problem is that it consists of a mixture of strong primary solvents, and while it will soften and blend a finish, it will take it completely off just as easily. Because it is so tricky to use, the one company I know of that is selling it tries to restrict its sale to professional finishers. Fortunately, there are easier reliable methods.
If the lacquer is thick enough, you can buff out scuffs with either rubbing and polishing compound, for gloss lacquer, or with 0000 steel wool and paste wax, for satin finishes. With lacquer that’s not thick enough to buff, you can clean the surface, sand lightly to blend out the scuffs, then go over it with another coat of the same type of lacquer.
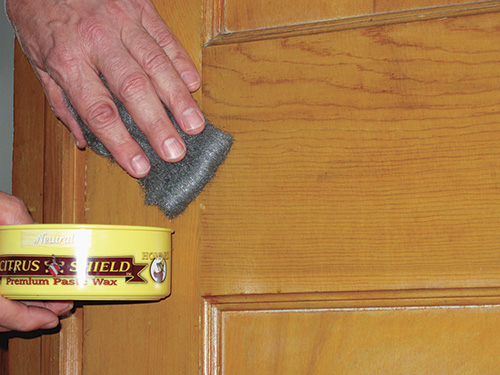
Nitrocellulose and most acrylic lacquers re-melt themselves with each coat. That means a wet coat will soften and blend into the old lacquer, effectively flowing out and hiding the scuffs. Many repair folks, in cases like this, pre-spray the finish with a thin coat of retarder, or even just lacquer thinner, prior to spraying the coat of lacquer. This will help soften and flow the surface, making it more likely to hide unsightly scuff marks.
The post How to Repair Scuffed Lacquer appeared first on Woodworking | Blog | Videos | Plans | How To.
]]>The post Spending Less Time and Effort on Sanding appeared first on Woodworking | Blog | Videos | Plans | How To.
]]>There is. Yes, there’s a secret to making sanding go quickly, easily and painlessly, and if you keep reading, I’ll tell you what it is.
You’re welcome.
Overview
To be perfectly honest, most folks sand way too much. The goal is to sand very little, yet still get great results. That’s entirely possible, but in order to do that, you need to know a few things; which paper and grits to use, when to switch grits or papers, how to use sandpaper efficiently, and most importantly, the object of each sanding step. After all, if you don’t know what each sanding step is meant to accomplish, how can you know when to stop sanding?
The Steps
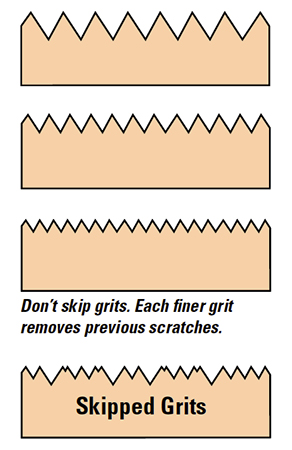
The first round of sanding has two goals: flatten the wood and remove tool marks. That’s all you need to do, and you want to do it as quickly as possible. Therefore, use the coarsest paper that’s practical: usually, 80-grit. Using a harsh grit does this job quickly. If 80 doesn’t do it fast enough, go down a grit to 60, then back to 80, but remember, the goal is to get it flat and remove tool marks quickly.
Once the wood is flat and free of tool marks, you move on to the second, third and all other sanding steps. They all share just one goal: to replace the sanding scratches from the previous grit with finer scratches. You do that by sanding with a grit close to the last one. For instance, go from 60 to 80, from 80 to 120, from 120 to 180, and from 180 to 220.
The Paper
When sanding raw wood, I prefer aluminum oxide grit. It’s sharp, cuts fast and because it is usually friable, it fractures as you use it so that it continues to present a sharp cutting surface to the wood. However, that does not mean you should overuse it. Sanding with dull aluminum oxide paper is false economy; it makes you work harder, go slower and accomplish less. Switch to a fresh sheet frequently and never mind if you haven’t worn away every single bit of grit on the surface.
Now for the tough part: how to tell when it is time to stop sanding and move on to the next grit. I’ve explained what the objective of each step is, but to know when to stop, you need the best sanding techniques, both by hand and with a machine. That’s because the technique itself will tell you when to stop sanding. This may sound hard to believe, but it is true. Bear with me and I’ll show you what I mean.
By Hand
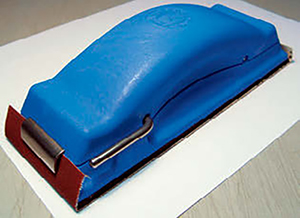
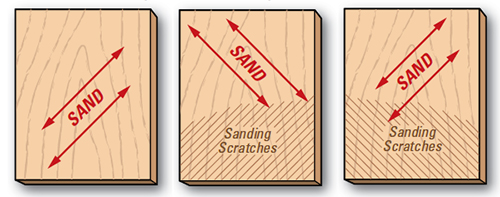
Wrap the sandpaper around a comfortable, hand-sized block lined with cork or rubber on the sanding face. Sand diagonally to the grain. Yes, I said diagonally, NOT with the grain. Diagonal sanding cuts the wood quickly and prevents “washboarding,” which often happens, especially on soft woods, when sanding with the grain. Washboarding occurs when the softer early wood bands erode more quickly than the harder latewood lines.
Now for the clever part. Switch grits, and sand diagonally in the OPPOSITE direction. Conveniently, your new scratches will be at right angles to the previous sanding scratches. As soon as all the scratches from the previous sanding are gone, you are done with that grit. That’s easy to see, since they go in the opposite direction of how you are now sanding. Clever, eh? Now move to the next grit and, once again, change diagonals.
Random Orbit Sander
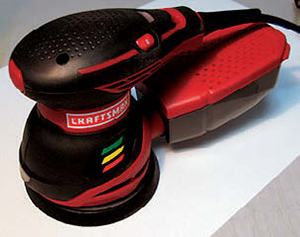
There’s a trick for random orbit sanders as well. You’ve heard “slow and steady wins the race?” With a random orbit sander, the seemingly contradictory trick is to slow down in order to speed up.
There are two rules: don’t press down on the sander too hard, and don’t move it faster than one inch per second. Pressing down will slow the orbital movement, and that means it’s less efficient and won’t sand as fast. Moving the sander too quickly will create “pigtails,” but worse, it will make it almost impossible to know when to stop sanding. You may find yourself scrubbing forever.
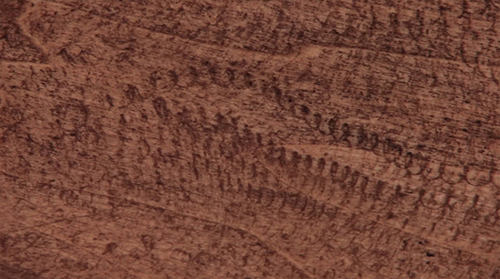
However, if you move the sander only one inch per second, you only need to go over each area ONCE. At that speed, one pass will make the sander dwell about five seconds on each spot. Assuming you didn’t skip a grit, that’s just long enough to remove the previous sanding scratches. Hence, move the sander slower, and you’ll get done sanding faster. You’ll also know exactly when to move to the next paper.
Before you insist that you normally move the sander that speed, please take the speed test. See the scale on the left? Start at the top and move your finger to the bottom, but take a full 9.5 seconds to do it. Now be honest; is that really how slowly you usually move your sander?
I thought not.
An Extra-Special Step
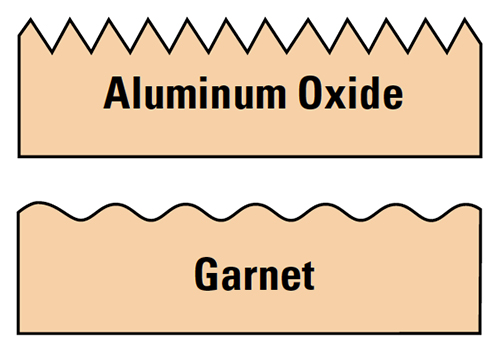
One of my favorite sanding tricks is to follow my final grit, often 180, with the same grit, but in garnet paper. This time, sand by hand, going with the grain. The slightly dull garnet paper leaves a surface that takes stain more evenly, and it even helps burnish end grain, limiting its stain absorption somewhat.
Why does this work? Although aluminum oxide paper is usually friable, garnet paper is not. As you use it, the grit quickly rounds over, leaving a softer, U-shaped scratch rather than the harsher, V-shaped scratches typical of aluminum oxide. By using the same grit size, you quickly and easily align the scratches with the wood grain while softening them up at the same time.
Now that you know the timesaving sanding tricks the pros use, go on out there and sand, quickly and easily.
The post Spending Less Time and Effort on Sanding appeared first on Woodworking | Blog | Videos | Plans | How To.
]]>The post What Is the Best Finish for Marquetry appeared first on Woodworking | Blog | Videos | Plans | How To.
]]> Sanding Sealer, sanding between every two or three coats? I find that this product goes on rather easily and, since a marquetry picture doesn’t experience any appreciable wear, I thought it would be an acceptable alternative to the much “smellier” Deft® lacquer that I’ve been using for a number of years now.
— Robert Swanson
Wichita, Kansas
You chose wisely. Zinsser SealCoat Universal Sanding Sealer is pure, dewaxed shellac, and that is an excellent finish for a marquetry picture. Dewaxed shellac seals well over all woods, comes in a variety of hues, and has good wetting and clarity. I like to flood on the first coat liberally, then wipe it all off. Woods prone to absorb more finish will do so, resulting in very uniform sealing. Thus, by the time you get to the second coat, you have a more uniform surface than you started with.
Because it contains a polar solvent, the first coat of shellac will raise the grain of wood slightly, leaving it not rough, but furry. I like to knock back the “fur” with a very light scuff using 800-grit sandpaper, taking pains to avoid cutting through to raw wood. Because shellac dissolves itself with each coat, you don’t need to sand after that unless you get dust, dirt, brush marks or spray marks (runs, overspray, etc.) in the finish. As long as it goes on smoothly, there’s no need to sand between coats when using shellac.
The post What Is the Best Finish for Marquetry appeared first on Woodworking | Blog | Videos | Plans | How To.
]]>The post Finishing Options for Garden Beds? appeared first on Woodworking | Blog | Videos | Plans | How To.
]]>– Marvin Wachs
Joplin, Missouri
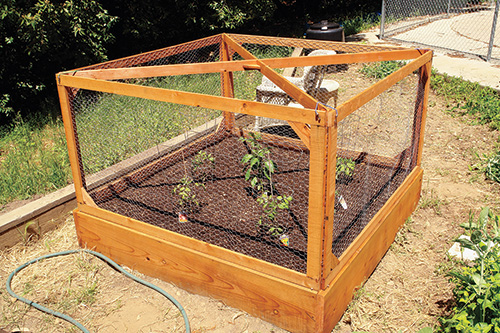
One of the great myths of outdoor woodworking is that the “right” finish will add the properties you really want the wood to have. It won’t. Thus, I would have started by choosing a wood with high natural resistance to rot and bugs. Old-growth red cedar fits that category, but the cedar we buy today does not. Whatever you do in terms of finish will not change the essential nature of the wood and will provide only very short-term protection, if that.
I haven’t seen any lab tests confirming it, but I’d suspect that of all the finishes you listed — and all of them are certainly acceptable exterior finishes — I’d guess that burning, either with or without oil, will offer the most protection, as it creates a layer of carbon atop the wood.
Personally, I’d line the inside of the planter with an inert gardening plastic, something made to be in constant contact with water and soil. If you use a plastic liner to isolate the soil from the wood, there’s no reason you can’t substitute pressure-treated wood (yes, there is pressure-treated cedar) for more longevity. And, yes, I see the irony in pressure treating new-growth cedar to make it behave the way old-growth cedar does naturally.
The post Finishing Options for Garden Beds? appeared first on Woodworking | Blog | Videos | Plans | How To.
]]>The post Using Shellac Inside and Outside of a Project? appeared first on Woodworking | Blog | Videos | Plans | How To.
]]>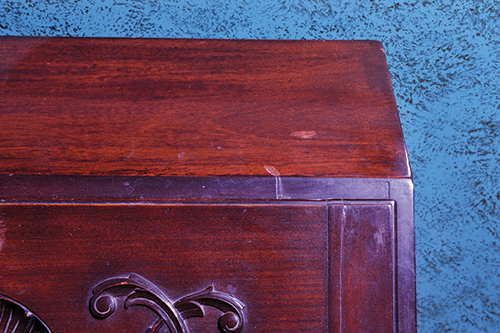
The cherry piece is a dresser with drawers. The Internet tells me that using oil-based finishes will give off fumes for a long time. This is why I was going to use shellac, but if there is another product that could be used on the inside of drawers without fumes and would not discolor the cherry, I would be open to trying something else.
– R. Clark
No, you don’t need to worry about blotching with shellac on cherry. And yes, oil-based finishes can leave a lingering odor, especially on interior surfaces. For that reason, among others, it is traditional to leave the insides of chests of drawers, and the insides of the drawers themselves, unfinished. However, if you choose to seal them, shellac is an excellent choice and will not impart any lingering odor once it is dry. In fact, shellac is often used to seal in odors that one can’t remove.
I’ll just add one unsolicited comment. While shellac is wonderful for many things, I’m not sure I would choose it for the top of a dresser. Spilled cologne, perfume, nail polish, nail polish remover or anything strongly alcoholic (rubbing alcohol) or alkaline (many mirror and “all surface” cleaners) can all damage and even remove shellac. Shellac is also prey to moderately high heat, from a hot coffee cup to a curling iron. Thus, for a top, you might want to seal it with one thin, flood-on/wipe-off coat of shellac, but for more durability, I’d top the top with polyurethane or conversion varnish.
The post Using Shellac Inside and Outside of a Project? appeared first on Woodworking | Blog | Videos | Plans | How To.
]]>The post Frequently Asked Finishing Questions appeared first on Woodworking | Blog | Videos | Plans | How To.
]]>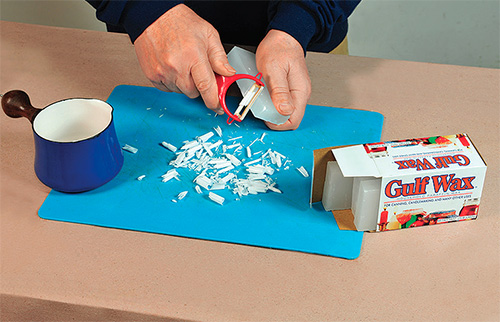
I enjoyed your tip suggesting coating a cutting board with paraffin. In sharing it with my wife, she wondered what would happen if you put a hot roast on the board for cutting. Will the hot meat melt the paraffin coating?
– Terry Elfers
Cincinnati, Ohio
Canning paraffin, which is what we used in the article, starts to melt at about 100° F., so yes, a very hot roast could theoretically soften or even melt wax. It would not matter much because you scrape all the paraffin off except what resides in the pores. Since a cutting board with a roast on it is horizontal, and melted paraffin flows downward thanks to gravity, you would not likely get any on the roast, or at least not enough to notice. If the surface of the hot roast is wet (juicy), as is usually the case, wax won’t adhere to it anyway, and in any case, that wax is nontoxic.
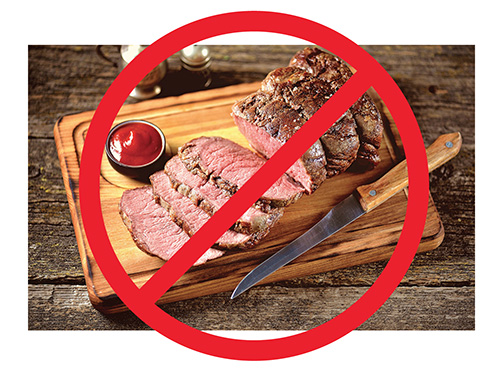
Still, I should point out that paraffin is generally used not on serving boards, but on butcher’s chopping blocks, mainly used for cutting cold, raw meat, where the surface is all end grain. For a serving board, or even a flat grain cutting board, I’d go with boiled linseed oil.
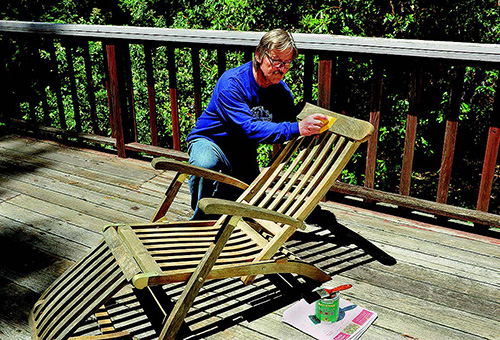
I make lawn chairs for neighbors and family. I use pine lumber because of cost and put clear varnish on for finish. After a year or two, the finish fades or peels. Someone told me to spray chairs with the clear finish they use on cars. Can I really do that? Look forward to your reply so I can make more durable items.
– Paul Liput
Hacienda Hills, California
Yes, you can spray wood with automotive clear coat, but I think you have a larger problem than that will solve.
Pine is not an ideal choice for exterior furniture since it moves a lot, contains a lot of sap, is rather soft and, unless it is pressure treated, has no natural resistance to bugs or rot. If you really want to make more durable items, start with a wood that has good exterior durability (mahogany, white oak, red cedar, ipe, redwood, cypress, teak).
To get back to your specific question, there are plenty of finishes that will work on pine, but do make sure you check the wood’s moisture content before finishing, and let it dry if it is above 12%. Finishing wood that is too wet is an invitation to peeling.
A good exterior clear varnish or spar varnish should hold up more than one year, but not much more. Other options include deck coatings, which need almost yearly renewal, exterior house paint (over primer) if you want a solid color, or even, as someone suggested to you, automotive urethanes. Nothing will hold up very long, so your choices are between something that holds up a little longer, or something that is easy to rejuvenate.
In my retirement, I anticipate creating woodworking projects such as multi-species cutting boards, wooden bowls, wooden spoons, etc., etc.
I have completed several of those cutting boards for a couple of my granddaughters and finished them with mineral oil with the assumption that they would be food-safe. Through normal use, the boards have needed a refurbishing. My question is: Am I correct in my assumption? Or would it be better (and food-safe) to use the boiled linseed oil instead of the mineral oil? If I can use the linseed oil, can I apply it directly over the mineral oil presently on the boards without presenting an adhesion or curing problem?
– Herb Fogelberg
Woodbury, Minnesota
Yes, and no, in that order.
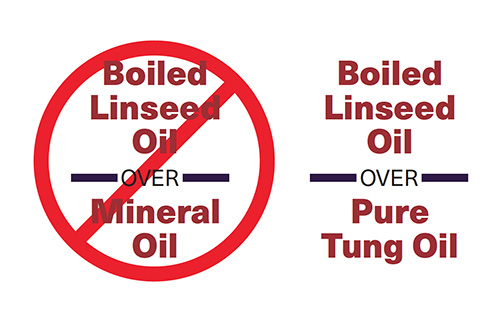
Yes, you can use boiled linseed oil on a cutting board. It is food-safe once dry, and it will hold up a lot longer than mineral oil, though not forever. You can replenish when needed.
No, you can’t go over the mineral oil, since that never dries and you can’t put a drying finish, like boiled linseed oil, over a non-drying or still wet finish. To redo the board you’ve already done, first remove the mineral oil by scrubbing the wood with mineral spirits to solvate the mineral oil, then blotting it up with paper towels. Get as much oil out as possible. Follow up with a scrub using an ammonia based cleaner, such as Windex®. Ammonia is a surfactant, meaning it will help “grab” that last bit of mineral oil.
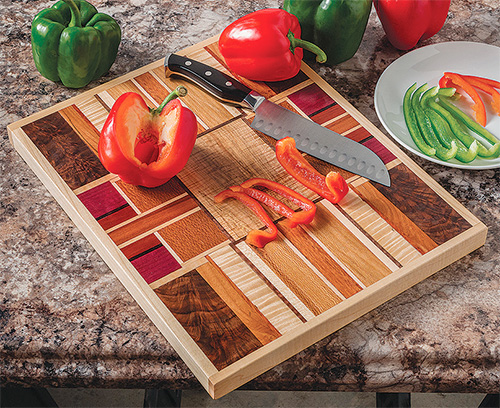
When the wood is clean and dry, sand it smooth, then flood it liberally with boiled linseed oil, re-wetting the surface wherever the oil is absorbed. After 10 or 15 minutes of flooding, wipe off all the excess oil and let the board cure in a warm, dry place for two days before putting it into service.
Incidentally, drying oils, like linseed oil, may not cure over woods in the dalbergia family, so if you plan on using anything from the rosewood family in your multi-species boards, leave those natural.
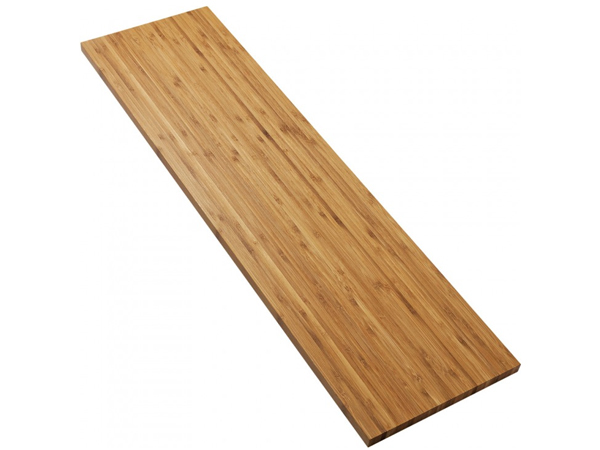
I have built a dining room table using bamboo flooring that I planed down to a uniform thickness. I glued it to a 36″ x 54″ top and sanded down to a 500-grit paper. I finished with five coats of tung oil, using 4/0 steel wool between coats. When we put a coffee cup on the table with a coaster, it raised up the tung oil and also raised up the grain on the wood. I thought maybe I didn’t wait to cure the oil.
After reading your column, I noticed noticed that the author leans to boiled linseed oil — and his tung oil shows “100 percent pure tung oil.” Do I need to sand off my tung oil down to bare wood, or can I apply BLO on top of the tung oil?
– Marvin Steffen
Alford, Florida
I’m going to assume you are certain that your flooring was pure bamboo with nothing else in it. Otherwise, this may be a different issue entirely. You might be dealing with resin or waxes added to the bamboo “boards” during manufacture, which could affect how oil dries and cures. Let’s assume you have untainted bamboo and move on to the finish. I don’t know what was in your “tung oil” product, but if it did not dry completely, you want to remove it, even if you must resort to paint remover. First, though, try scrubbing it with mineral spirits on a nylon abrasive pad. That should remove any uncured oil. You won’t have much luck trying to sand oil off: sanding liquid oil simply grinds it into the wood and moves it around.
You can certainly go over cured tung oil with linseed oil, but that’s not what I would suggest in this case. For a dining room table, which gets lots of wear and plenty of heat and stains, I’d go with an oil-based polyurethane varnish. It, too, can go over any cured oil. Just clean and scuff sand for adhesion first.
The post Frequently Asked Finishing Questions appeared first on Woodworking | Blog | Videos | Plans | How To.
]]>The post GluBoost Adhesive Products appeared first on Woodworking | Blog | Videos | Plans | How To.
]]>However, GluBoost® products are different indeed and open up a whole new world of options for us woodworkers.
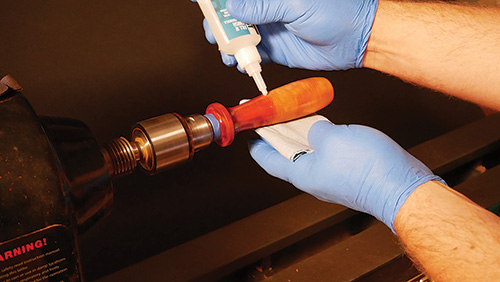
Most notable in their line is Fill n’ Finish , a flexible, clear cyanoacrylate that stays liquid until you spray it with GluBoost accelerator, after which it solidifies instantly and cures clear. It seems hard to believe, but it’s true.
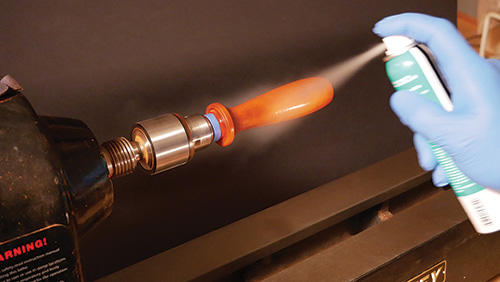
That means you can apply it to wood as a finish or pore filler, take your sweet time about getting it smooth and uniform, then spray it, and it cures almost instantly, ready to sand or recoat in just seconds. Among other uses, it is perfect for finishing turnings, right on the lathe. It cures clear, with no bubbles, pitting, hazing, crazing, blooming, yellowing or white spots.
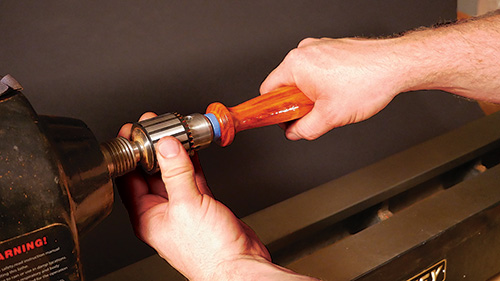
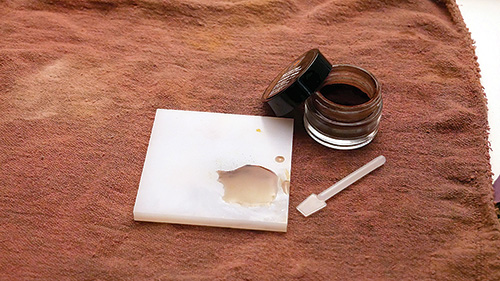
Because it stays liquid indefinitely, you can even color it by mixing their Master-Tint line of colorants right into the cyanoacrylate, and it still won’t cure until it is sprayed with accelerator. Add a small amount of powder for a translucent color, more for solid colors. It’s a boon for filling dings in every type of clear, tinted, or solid color finishes, including notoriously hard-to-repair epoxies and polyesters.
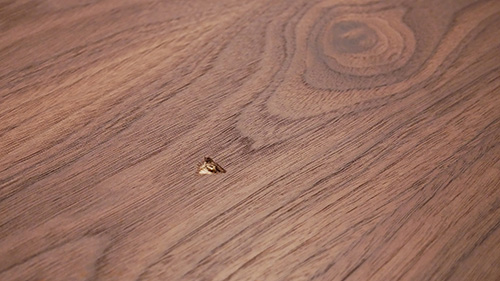
Once Fill n’ Finish does cure, it is flexible. We don’t often think of them that way, but all wood finishes must be somewhat flexible to tolerate wood movement without cracking.
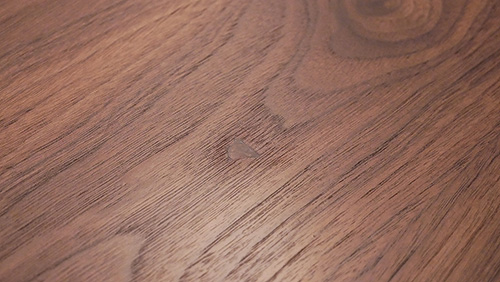
That flexibility is essential as a finish and also to create repairs in cracked or dinged finishes that don’t pop out or crack over time. As an adhesive, a flexible glue line is more shock-resistant than a rigid one.
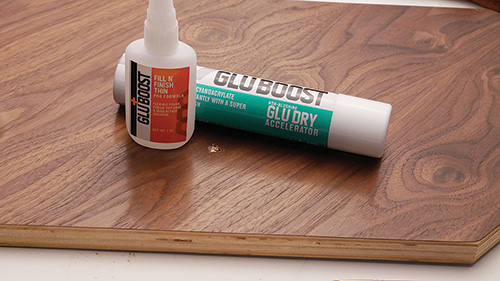
The GluDry accelerator itself is also very slow drying, which is quite handy if you plan to use either Fill n’ Finish or their more typical adhesive, MasterGlu, as traditional adhesive. Spray one side of a bond with accelerator and put the cyanoacrylate on the other. Once they come in contact, cure comes in seconds.
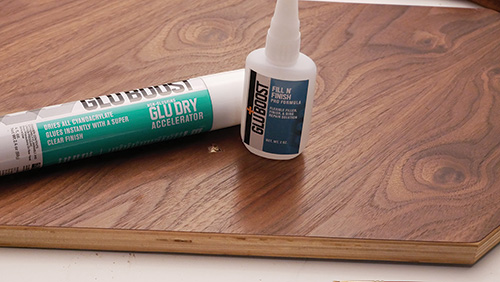
Both the slow-drying, long open time Fill n’ Finish and the more typical self-curing MasterGlu come in both regular and super thin versions, the latter ideal for penetrating dense woods. Both are great for solidifying spalted or punky wood.
If you’re wondering why you’ve not heard of Glu-Boost before, in part it is because the products were first introduced to luthiers (guitarmakers) and mostly sold through luthiery supply companies.
You can find out more through their website at www.gluboost.com, where the 2 oz. bottles of Fill n’ Finish sell for $15 and the 4 oz. GluDry is priced at $12.
The post GluBoost Adhesive Products appeared first on Woodworking | Blog | Videos | Plans | How To.
]]>The post Applying Oil Finishes and Varnishes on Wood appeared first on Woodworking | Blog | Videos | Plans | How To.
]]>Drying vs. Non-drying
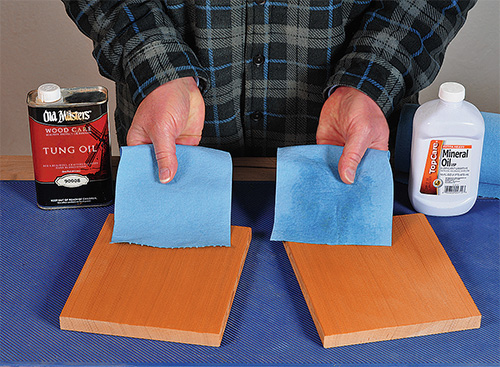
There are two types of oils — drying oils and non-drying oils. In my mind, drying oils are the only valid finishing oils. They start out as liquids, but they cure to a solid film. To me, that’s the definition of a finish.
Typically, nut oils are drying oils, and the most common ones we use are linseed, tung and walnut. These drying oils cure by taking oxygen from the air and crosslinking the oil molecules into much larger molecules. Once the new molecules get big enough, the resulting matrix they form becomes a solid instead of a liquid, forming a film either in the wood or on the wood.
The most common is boiled linseed oil (BLO), which, in spite of its name, is neither boiled nor heated. Instead, it contains metallic drier that speeds up the cure time. A coat of raw linseed oil will take over a week to dry; one of BLO will often dry overnight. Tung oil dries quickly by itself, so it generally does not need driers added to it. Unmodified walnut oil dries even more slowly than raw linseed oil, which is why I avoid it.
Non-drying oils are usually vegetable (peanut, olive, corn, coconut, rapeseed) or mineral oil, which is extracted from petroleum. Orange and lemon oil, typically mineral oil with citrus scent added, are also in this group.
These do not form a film but stay wet indefinitely. They can come off onto whatever comes in contact with the oiled wood, and they will soon wash off with soap and water.
Thus, putting vegetable or mineral oil on wood is not a finish, but a wood treatment, and a temporary one at that.
Important Safety Note!
Drying oils are spontaneously combustible. Take all rags and wipes containing drying oils and lay them out one layer thick until they are dry and crusty, at which point they can be safely added to your household trash.
VOCs vs. Solids
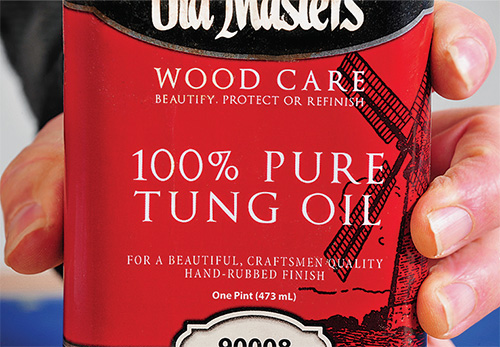
Concerned about VOCs? Those are the finish solvents, restricted by the EPA, that can cause dangerous ozone buildup in the presence of sunlight. Pure oil has none whatsoever, because it has no solvent in it. Thus, it is a 100% solids finish. Solids are whatever stays on the wood, after the solvent, to become the film. Clearly, this is a very eco-friendly finish; it comes from plants and contains no solvents, harmful or otherwise.
Where’s the Film?
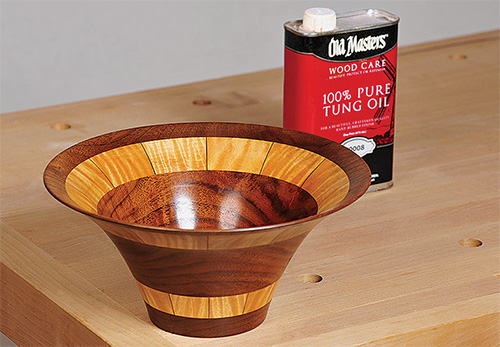
In many woods, the first coat of oil penetrates and is almost entirely absorbed by the wood, so it does not look like a film was formed. It’s there, but it is in the wood, not atop it. The oil cures in the outer layers of wood fibers. But even if you add no more than one coat, cured oil will still help the wood shed water, oils, dirt and some, but not all, of the things that stain wood. Add more and you get more protection. Multiple coats can eventually build up a gloss film.
Applying Oil
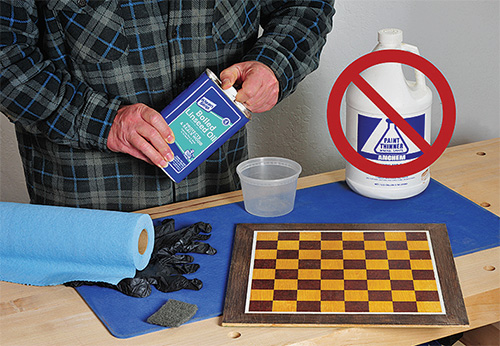
Do not add solvent to pure oil. It will not, as some believe, increase absorption, and will only reduce the amount of protective film per coat while contributing to environmental problems.
Flood oil onto the wood liberally, keeping it wet for at least 10 minutes. If areas of the wood absorb all the oil in under 10 minutes, add more, keeping the whole surface fully wet. When it stops absorbing oil, wipe all the oil off the surface. You’ll have a uniform, dustfree coat with almost no effort.
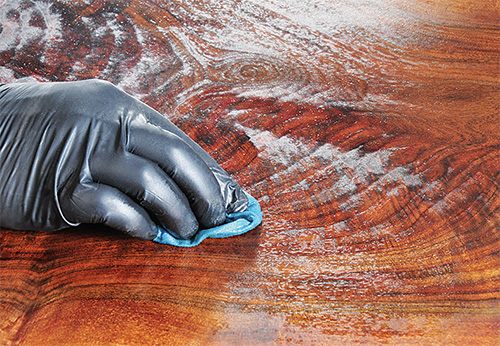
Want more build? Do the same thing the next day, and the next, adding one flooded on/wiped off coat per day until you get the look you want. One coat will look woody and natural, while 12 coats (over 12 days) will look like traditional varnish.
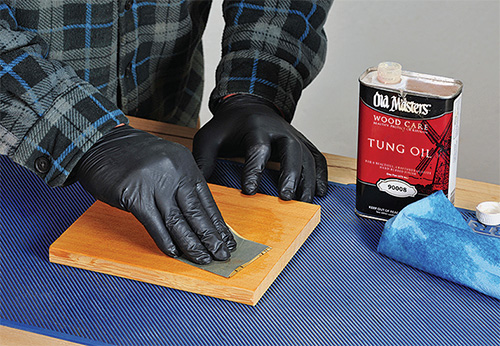
To speed the process, or create a slurry to help fill open pores, sand the oil into the wood with fine wet/dry paper.
Oil Varnish
Where oil has only one ingredient, varnish contains resin and solvent. Traditional spar varnish, for instance, contains tung oil, phenolic resin and mineral spirits or naphtha. The most common varnish resins, alkyd and polyurethane, can be made by chemically modifying linseed oil.
In spite of their names, Danish oil and teak oil are not oils, but thin varnishes. Manufacturers call them “oil” because they are designed to be applied just like oil. The truth is that you can apply any oil varnish the same way you apply pure oil: flood it on, wipe it all off, and repeat with one coat per day until you get the build you want.
Forget the Solvent
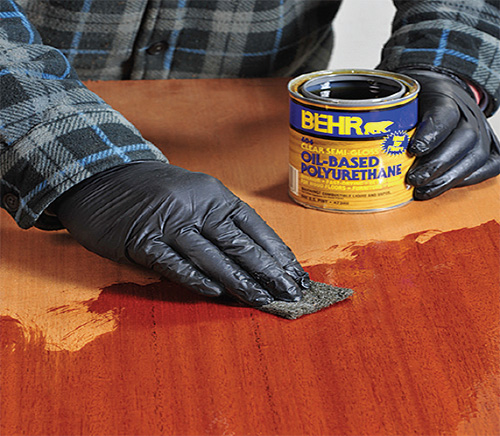
Whether it’s Danish oil or polyurethane varnish, there’s no need to thin it for this type of application: any solvent only acts as a diluent and does not effect how well the finish penetrates the wood.
With thicker varnish, a nylon pad (such as ScotchBrite®) works best to scrub the varnish on before wiping it off. Of course, should you prefer to spray or brush thick varnish, you’ll likely have to thin it for workability.
Exceptions
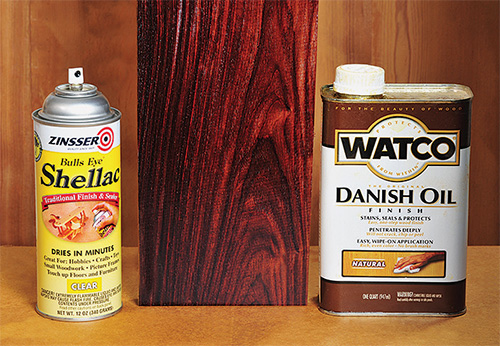
There are a few woods over which oils will not cure properly. Notable among them are most Dalbergias (rosewoods) and some aromatic cedars.
Remember how oil and oil varnish cure by using oxygen from the air to crosslink the molecules? Such “problem” woods contain antioxidants that prevent oxygen cure.
The solution? Seal them first with a thin coat of dewaxed shellac, after which you can switch to oil varnish.
But What About Nut Allergies?
Once they cure, drying oils, which are usually nut oils, form a solid, inert matrix that will not come off on your hands or in your mouth. Thus, the odds of a negative reaction should be substantially less than with wet oil.
Anything can happen, but in more than 45 years in this field, I’ve never seen an allergic reaction to a cured film of linseed oil.
The post Applying Oil Finishes and Varnishes on Wood appeared first on Woodworking | Blog | Videos | Plans | How To.
]]>