Issue 590
Issue 590
A Cure for the Summertime Blues

Life has its ups and downs. My Minnesota Twins have proven to be merely mortal as they try to get to the playoffs. My hunting dog and his tubby owner have to start to get in shape for the fall hunting season, and I still have a long list of things to do around the house before the snow flies. Ah … such a heavy load.
But woodworking continues to be a respite from the slings and arrows of outrageous fortune. I have several projects cooking right now that you’ll likely see in the future. And I hope woodworking is your cure for the summer blues too. I think it will be for Harley Snyder of Springfield, Missouri. He was the winner of our Stumper’s Giveaway — a $100 Rockler gift card will be heading his way. (By the way, that mystery tool was used for rug hooking.)
Speaking of giving away free stuff, our first video in this Weekly is a sample from our Premium Content on woodworkersjournal.com. The gated content is free to subscribers to our print magazine, so check it out. We’ve got tons more content like it. The second video is of yours truly showing how to effectively stain highly figured hardwood without it blotching in the process.
Hang in there, stay cool and keep on woodworking!
Rob Johnstone, Woodworker’s Journal
![]()
Featured Videos
Applying Topcoats
This video is part of a collection of Premium Videos in Michael Dresdner’s “Step-by-Step to a Perfect Finish” series. Michael and Joanne Leibeler take you through the Finishing Flowchart in order to choose and apply the best finish for any project. You can learn more about this series here and subscribe to Woodworker’s Journal to get access to the whole collection.
![]()
Stain Finish for Highly Figured Hardwood
1. Sand the project up through the grits until at least 320-grit
a. It is a good idea to sand pieces that will be hard to reach before assembly.
2. Wipe the project with mineral spirits to check for glue splotches. Sand the glue away if found.
3. Apply a coat of aniline dye mixed with water to the surface. Flood it on with a staining sponge, and wipe it off with shop towels
4. Apply a sealer coat (Zinsser Sealcoat) of a shellac-based finish by wiping: flooding the surface with finish and wiping it off.
5. If you have any nail holes, cracks or defects in the wood, fill them now with a wood filler putty that matches the color of the stained wood (sand smooth)
6. Apply at least two coats of a wipe-on polyurethane
7. Optional: After the finish has cured for 72 hours, apply a coat of high-quality paste wax and then polish it off.
Supply Checklist:
– Sandpaper: 80-grit through 220grit (320- and 400-grit recommended)
– Mineral Spirits
– TransTint Dye
– Wood Finishing Value Pack
– Wonderfill Wood Filler
– Zinsser Sealcoat
– Urethane Top Coat
– Liberon Wax
– Shop towels or clean rags
Cutting
-

Cutting at a (Shallow) Angle
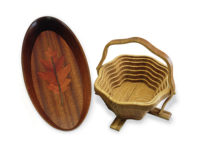
Shallow angle cuts create double-bevel inlays and collapsible baskets.
More on the Web
-

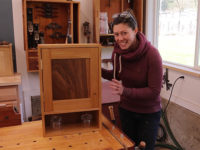
VIDEO: Making a Dovetailed Whiskey Cabinet
Anne Briggs designed and tackled a dovetailed whiskey cabinet in the Krenov Cabinet style with a frame and panel construction door, waterfall grain, butt hinges, and a sliding dovetail shelf.


